![]()
![]()


![]()
Serenity in LEGO
Construction
My first vision of a LEGOized Serenity was for a ship that was to scale with LEGO minifigures. Knowing the end result would be about six feet long, I redesigned my workshop to put an old kitchen table in the center of the room - knowing full well that it would be there for at least three months as things got built.
I worked for a week on the "big Serenity" before two things made me halt construction.
1) I realized I didn't have enough bricks in my collection to complete construction. Not by a long shot.
2) I dropped the cargo area on the floor and it shattered into a bajillion pieces.
Disillusioned, I moped about for a couple of days. Then my wife, ever the realist, asked a very obvious question:
"Why not just build it smaller?"
My off the cuff answer was of course: "Where's the fun in that?"
But, as the day wore on I realized she was right. Even at half the scale it'd still be a fun project - and probably one I'd actually be able to complete. So I reworked my scale guides and sat down to build once again.
Like the big version, I decided that starting in the center of the ship and building outwards was the way to go. So, using a printout that was very close to 1:1 with my final scale, I started work on the cargo area. In a day or so I had a little boat. Next, I wanted to rough in the nacelles. Here's some shots of progress at that point:
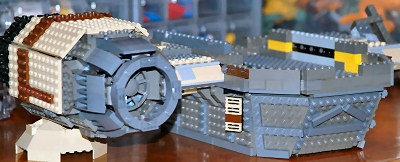
My initial design had the nacelles, wing, and hull as three separate items. Due to weight concerns, eventually I'd have to build the wings into the hull for stability.
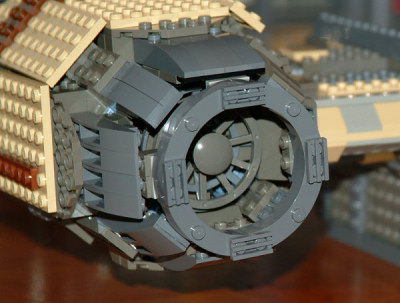
Here's a detail shot of the engine - This early design stayed pretty much the same until the very end of building, where it got a more rounded cowling.
To help load times, I've broken this section up into several pages.
Up next...The Neck Of Doom
Portions of this site make extensive use of Macromedia Flash. |
![]() |
|
![]() | Read updates on your
| Read updates on your ![]() Livejournal Friendslist
Livejournal Friendslist