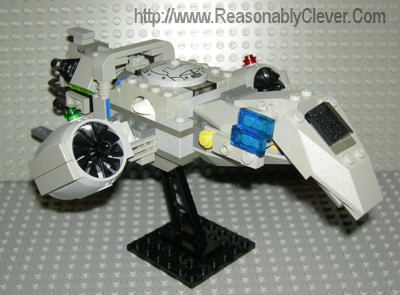
Friday, April 18, 2008

Serenity: Bracing

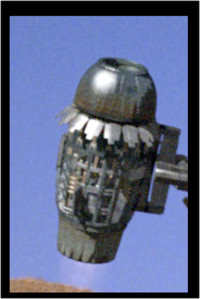
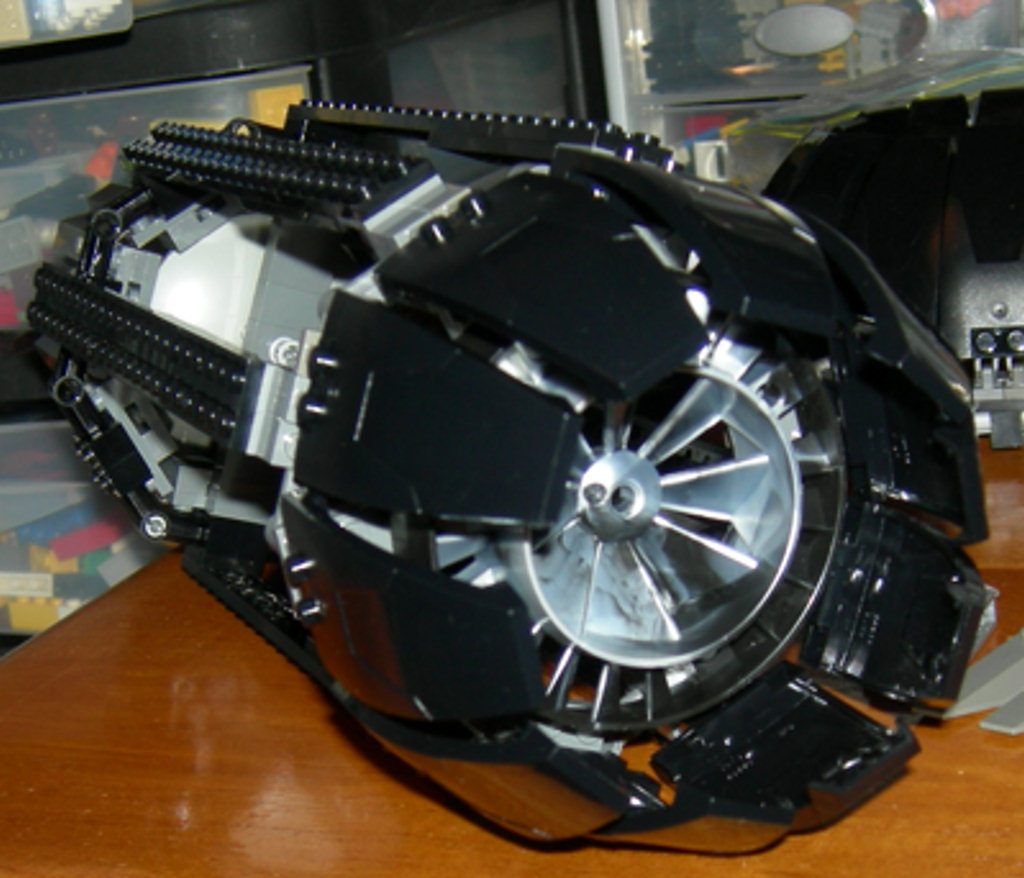
Another minor progress update. Last night I spent time figuring out how the side engines are going to mount to the larger model.

Of course, I'm going to try and follow the detailing of the movie as close as possible - but there's a big difference between a CGI model and a LEGO model that has to support its own weight...

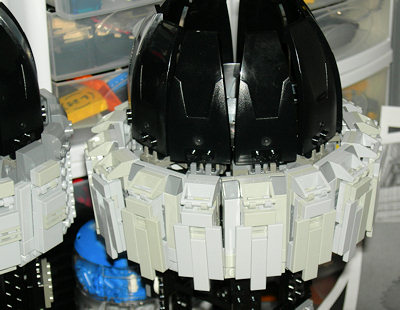
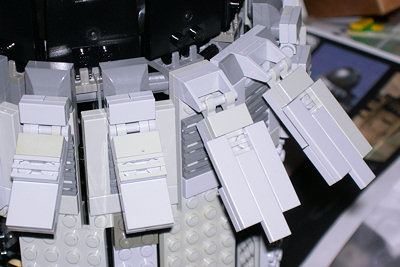
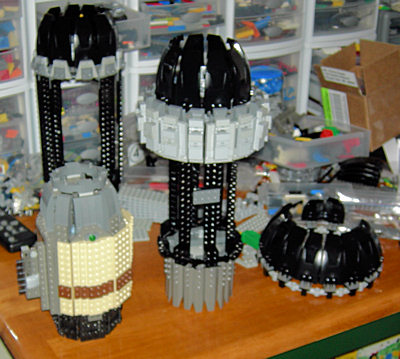
First off, though, was building a stronger base for the plates that will make the "skin" of the engine. (Remember- it has a hollow interior to try and keep things as light as possible.)


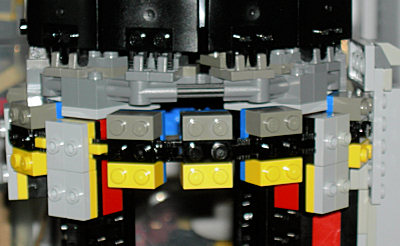
Basically I just enhanced each 1x2 click-hinge pieces with a 2x3 plate and two 1x2 bricks - the skin will seal these blocks with plenty of strength for what they need to support.

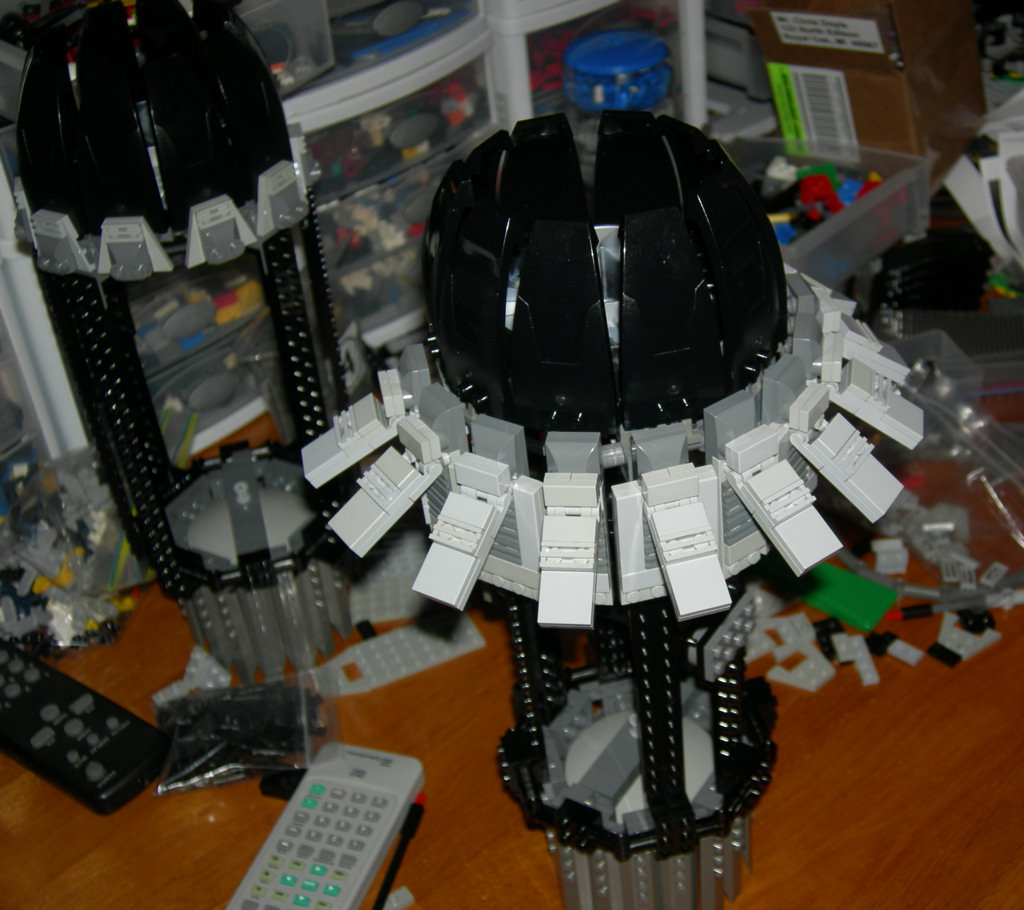
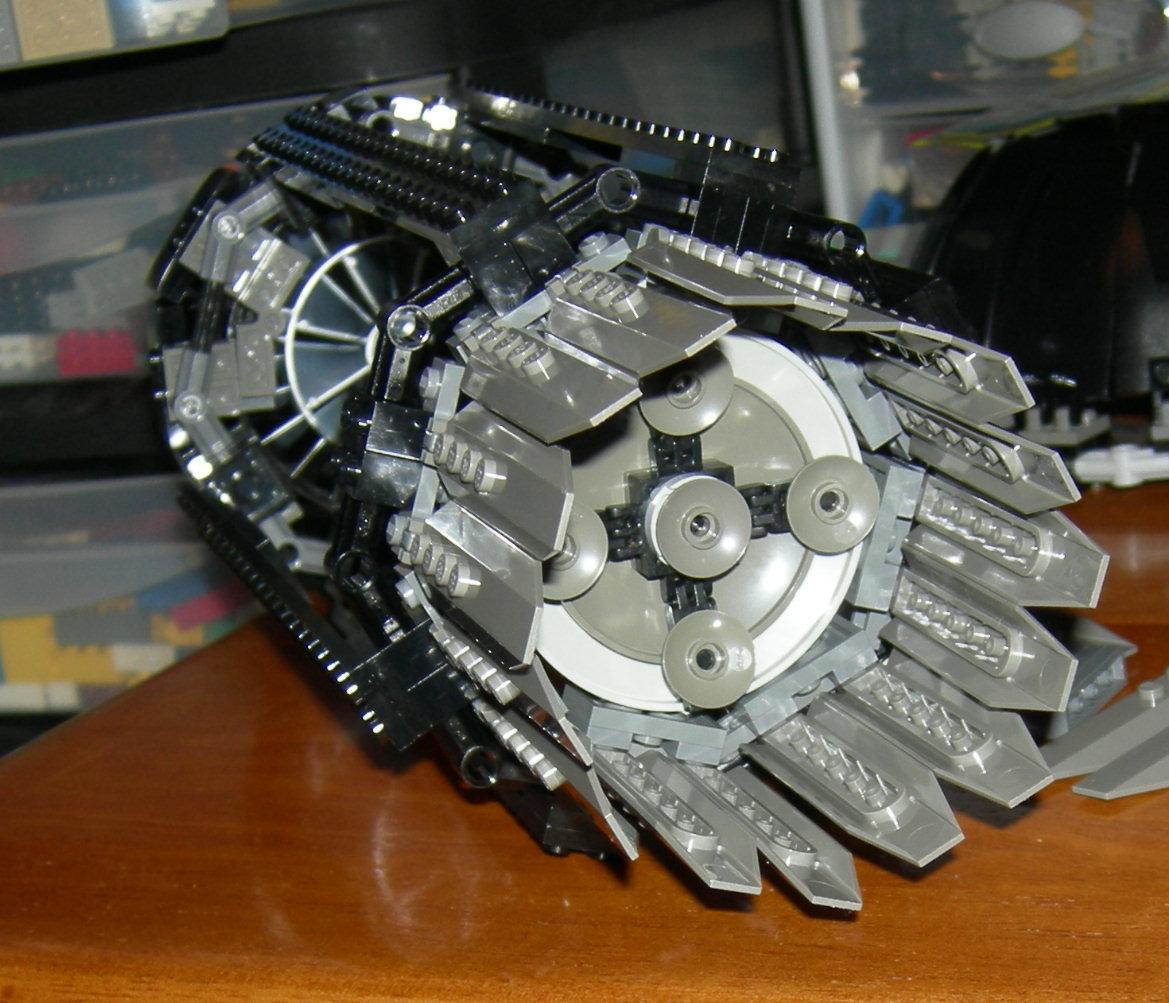
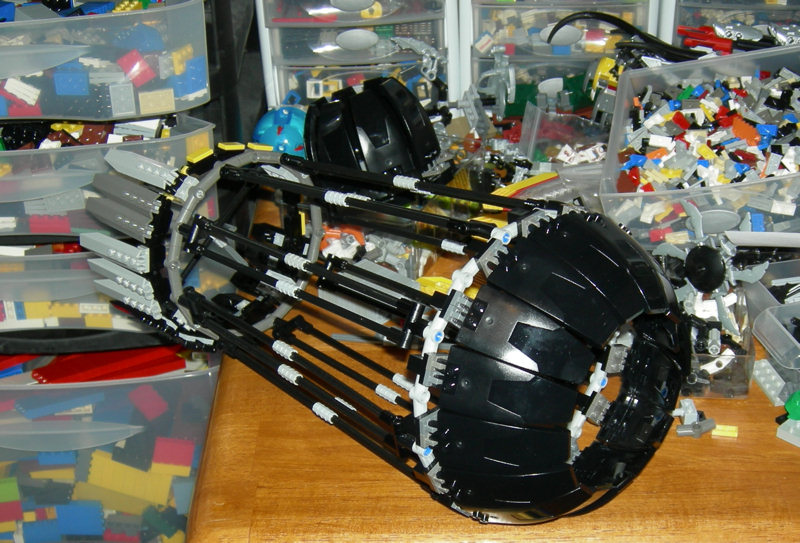
The larger blocks with the half-stud offset also got a redesign not shown here. Rather than using the very hard to find 1x2 click-hinge plates with offset tabs, I found a way to mount things to the support beams with a common 1x2 click-hinge brick. This is key, as I still need to build a second ring at the bottom of each side engine to complete the bracing.


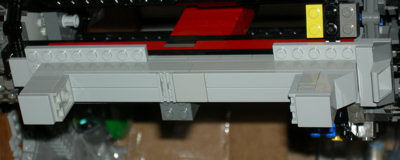
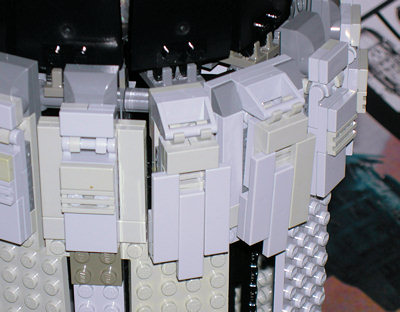
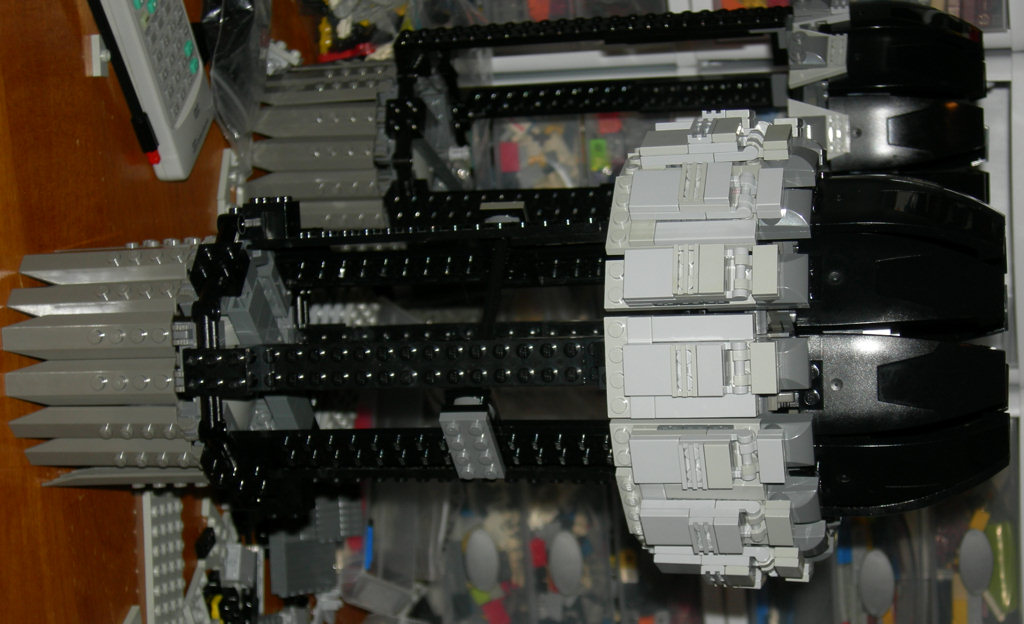
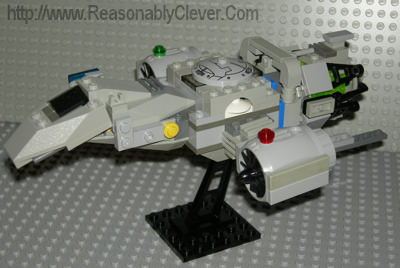
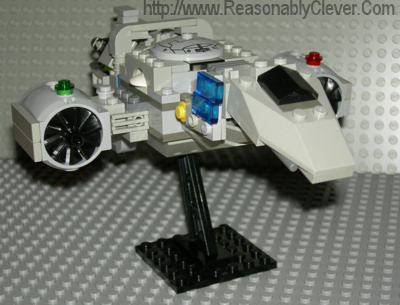
Speaking of bracing, here's the first part of the mounting bracket. The red bricks are a solid pillar of 2x6 bricks that connect the front and back braces. The grey 2x2 underneath is what will have to become the main support line - the "twist and turn" nature of the side engines means that when in "normal out the sides" mode, 90% of the weight is going to rest on those bricks. (The piston like brace seen in the movies is the real world analog)

I'd like to build some technic gearing to allow the brace here to rotate - allowing for real world posing. Not my strongest building area, but you have to learn sometime...

Labels: , ,


Click here for comments and discussion (and possibly the rest of this article!)

Thursday, April 17, 2008

Serenity: Small update

Just one small picture today - the completed revised flap ring. Of course, I've run out of 1x4 gray tiles now - time for another part order or two.


It also looks like I'm going to have to find a way to reinforce the "skin". Now that I've got the plates very close to gapless, it's a real pain to fix when one pops off - and they seem to be popping off more and more frequently. I don't know if that'll mean adding a second ring of click-hinges further down or just enhancing the connection at the existing join.

Something to putter with tonight, I suppose.

Labels: , ,


Click here for comments and discussion (and possibly the rest of this article!)

Wednesday, April 16, 2008

Serenity: Eye for Detail

Another small update, but one that demonstrates why I have to be in the right frame of mind to work on this project.

I was reviewing my archive of source photos and thinking about those flaps at the front of the side engines and my recent attempt to duplicate them.

As you can see in these two photos, I'm not too far off...


However, there was some real room for improvement. I also wasn't overly happy with the seam/join line between the cowling and the ring of flaps. So...after another stint in the workshop...


The final of about six tries at various shapes and methods - the two flaps on the left are original, the two on the right are the upgrades. (I had no idea how much grey and blue-grey I had mixed until I adjusted the contrast on these photos. Yikes!) The shape of the flaps is much more accurate - and the new join-line helps fill in the gap between the cowling and the rest of the "skin".

The biggest challenge was finding a way to go from 2 to 3 studs in width without going more than two plates in thickness. Once I had that figured out, the rest of the design came together pretty quickly.

Next step is to replicate the new design for both copies of the engine - then get to work on that connecting bracket.

Labels: , ,


Click here for comments and discussion (and possibly the rest of this article!)

Tuesday, April 15, 2008

Serenity: More side engine work

As requested, here's an update on the work on the Mini-fig scaled Serenity.

When last we left my workbench, I had just completed a draft of the side engine cowling. The scale was too large, however - putting things at Belville or even Mini-land scale. Too big for my target, anyway.


So...I spent several hours trying to find a way to reduce the number of fins in the cowling while still keeping a technic ring as a base for rigidity and stability. And trying to keep it as "gapless" as possible. This, as it turns out, is not an easy task.


The final result halved the number of fins, while still leaving a pretty clear "cone" effect.
(You can click on images for larger views if you want.)


Changing the scale of the nose meant redesigning the back end exhaust area - here's the new arrangement with "end cap"


Next, I decided to work on the area just aft of the front cowling. This area presented some new challenges - to create the gapless look I had to design a sequence of alternating 2 and 4-width plates attached to a ring of 2-stud click-hinges.

The advantage of that layout is that I was able to attach the click-hinge ring to the six support struts connecting the cowling to the exhaust. It's quite stable, although I'm worried about the overall weight of things, even with the hollow center. I didn't want to have to prop up the side engines with support struts, but I may not have a choice in the long run. (I suppose I could just make them stay in the down "maintenance angle", but where's the fun in that?)

Oh. There's one cool feature I built in already - as seen in the movie, the gray ring has working airfoils/vents.


The next step will be to build the mounting bracket that will eventually meet up with the side of Serenity. That needs to be sturdy enough to hold the weight of the completed engine - hopefully. After that, I'll finish up with skinning the rest of the midsection.

I've been taking some pretty intricate construction shots; I'd share them here but this post is already huge. If you look in the background of the shots above you can see that I'm building two of these engines at once. The idea is that once the design is finalized, I'll have one to keep intact and one to dissect, document, and rebuild. We'll see how that works out.

The final shot for today shows the three-bears approach to building. In this shot you can see the Mama-Serenity Side engine (too small), the abandoned cowling from my first pass (too big) and the new engine as it sits at the moment (just right.)

Labels: , ,


Click here for comments and discussion (and possibly the rest of this article!)

Thursday, April 3, 2008

Serenity: A fresh start

This is "Workbench" post - just thought I'd share the results of a couple of hours of tinkering last night.

Ever have one of those moments where you look at someone else's work and see a new application, a new creation just waiting to be built? Well, that happened to me when I was browsing the work menatarms did on his Elven Village.

After waiting for a couple of part orders to come in, I was able to start roughing in one of the side engines for Serenity.


(Click for larger view)

My plan is to make as much of the interior structure Technic as possible - with a think "skin" of plates on top, just like a CAD rendering. That should keep things light, yet sturdy.

The scale here is a bit larger than mini-figure - I'm going to make a call on that very soon. Plus the framework needs reinforcement along the middle and one side (where it will hook up to the ship) . I think I'll probably modify things to have a more rigid cylinder from the front to the midpoint (where the grey technic connectors are) and then slope things down from there instead of keeping the larger "V" shape for the full engine. Most of it will be hidden by the engine cowling anyway, and I think the cylinder will offer more support.

Anyway, it's a fresh start.

And, I have to say, it looks pretty shiny.

Labels: , ,


Click here for comments and discussion (and possibly the rest of this article!)

Wednesday, March 19, 2008

LEGO: Whence Serenity?

There's been a recent batch of posts and emails wondering if I've abandoned the Serenity projects. It's true I haven't had a lot of time to work on things in recent months, but that's all about to change.

I just placed an order for an updated set of Serenity Blueprints - once they arrive, I'll be putting in some serious work on the mini-fig scaled Serenity. The plan remains to build that monster one set at a time; to finish with a modular construction that has plenty of play areas and remains as slavishly devoted to the series/film as possible.

First up will be the cargo bay - a necessary point of origin as all the other sets/hull exteriors will have to fit around it.

And, yes, I'll still be trying to document the build in MLCad. It goes against my building style, but I know if I don't I'll never hear the end of it.

As to the new mid-scale version, I've been staring at the half-completed drive section for a while now and I'm really just not happy with it. I'm going to be taking another swipe at designing it soon as well.

Hope that satisfies some of you.

Labels: ,


Click here for comments and discussion (and possibly the rest of this article!)

Sunday, December 16, 2007

Snack Size Serenity: Version 3

I had to spend some serious time in the workshop this weekend just sorting through the piles of stuff that had accumulated. I parted out a couple of sets, cleaned off the workbench, and generally tried to get things back into a mode where I could get some actual creative building done.

One thing I did find time to do was to tweak the design of the Snack Sized Serenity model a bit. Ever since LEGO introduced the new turbine-style jet engines I've wanted to incorporate them into the model. Here are the results:


I have to say, I like these better than the X-wing engine mounts I had been using. I also replaced the plain grey radar dish on the top of the midsection with a pre-printed version from a Spider-Man set. (It was originally the front of a vault that Doc Ock was breaking into.)

Here are a couple more shots of the tweaks. Don't know if I'll bother to update the building instructions - it's a fairly easy change to the side engine mounts and a complete replacement of the side engines...nothing too complex.

(But still enough to call this a new version!)


Labels: , , ,


Click here for comments and discussion (and possibly the rest of this article!)