![]()
![]()


![]()
Church of the Flying Spaghetti
Monster
Construction Photos
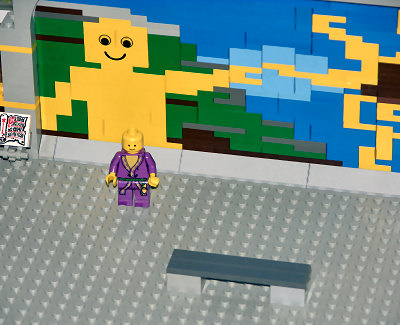
Here's the beginnings of the framework around each mural, as well as the
viewing bench. A lone mini-figure is shown for scale.This is actually a pretty interesting photo in that none of the elements shown here ended up in the actual church. The mural is the "one sided" version that would end up being rebuilt, the wall elements are completely wrong, there's no bench, and, in fact, no courtyard at all in the final version. The little mini-figure would eventually get a hat and go sit in a rowboat at the docks.

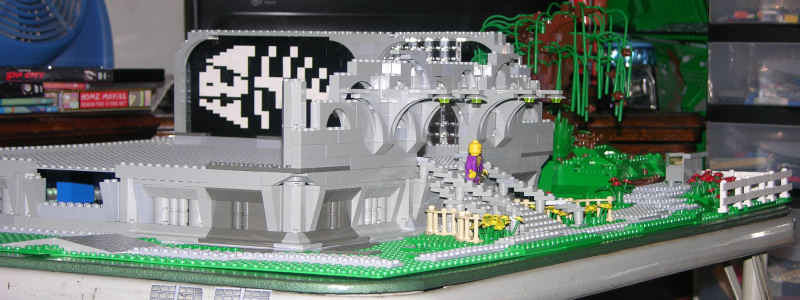
Here's a shot of an early stage of the church construction. The card table holds the full 3x3 base plate final layout, and the walls are beginning to be roughed in. At this point I was thinking the actual "service area" of the church would be contained in the last row of base plates and the grey area you see here would remain an open courtyard.
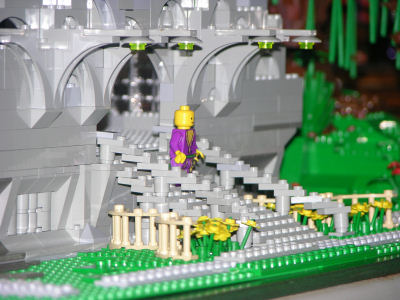
When I build, I tend to complete small sections as much as possible - in this shot you can see that the Shine of the Lost Meatball is pretty much done, as are the steps leading up to the front door. The doors, however, had yet to be roughed in - the archway there is actually too short for the doors I ended up using. The view out onto the Shrine is also in a "will this work?" stage - I had considered using smaller 1x2 bricks for a "blocks of glass" effect, but it didn't look as cool as I thought it might. Plus, I ran out of 1x2 clear bricks. I'd later pick up a bunch at the Mall of America's LEGO outlet, but by then I had moved onto a very different overlook idea.
Also note the light green base plate to the rear of the church - this would be replaced with another "water blue" plate before too long.
This shot shows the early stages of the front of the church. The "Noodly Architecture" is starting to take shape, although it has yet to reach its final height. Even at this early stage I knew I didn't want things to be bilaterally symmetrical - the arches are deliberately shuffled about to create a more organic feel.
The landscaping is starting to come along as well, although the path would undergo several more revisions before I decided to leave it alone.
I did know I wanted to add a "Wheelchair accessible" entrance on the side - that's why there's a gap along the base of the wall. I was trying to figure out what sort of engineering would be required for a working elevator.
Here's a closer look at the early front, prior to the doors being built. The whole door frame area would be redesigned and made taller to make room for the largest set of Castle Doors that LEGO had made. I still like the little light fixtures in the extended "noodles".

This shot gives a much better view of the early stages of the front facade. I put special effort into the railings on the stairs - I wanted a curved, organic feel to things. I also tried to continue that theme into the "noodle tiles" attached to the dark grey portions of the base wall.
LEGO enthusiasts might notice the few blue/grey bricks that have crept in - I decided early on that while I would try and keep the dark grey and dark blue/grey separate, the light grey tones would be freely mixed based on part availability.
Next Up: The Shrine of the Lost Meatball
Construction Pages: [ 1 2 3 4 5 6 7 8 9 ]
| Guided Tour | Floor Plans and Isolated Details |
| Construction Photos | Desktop Wallpapers and Icons |
| Go To The Official FSM Site | Frequently Asked Questions |
Portions of this site make extensive use of Macromedia Flash. |
![]() |
|
![]() | Read updates on your
| Read updates on your ![]() Livejournal Friendslist
Livejournal Friendslist