![]()
![]()


![]()
 The Propellers
Now that we've seen where the steam/energy comes from, let's take a look at how it's used.
First up, here's a detail of one of the side lifting propellers. I mounted all the gearing externally to try and emphasize the Steampunk nature of the build. The props are mounted at an angle because they look cooler that way.
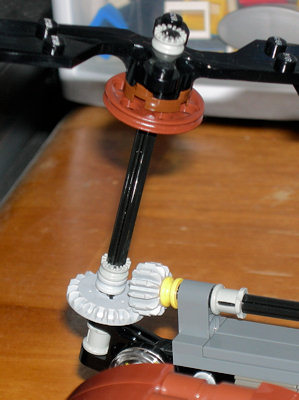
Looking back at my preliminary design, you can see the side props were the element most changed from my initial vision. At first I had intended to just run steam pipes to all four propeller areas and build engines at each endpoint. I had also thought about mounting things on some ladder-like rigging pieces from old Pirate ship sets. Two things changed my mind. First, the end result didn't have that "exposed machinery" feel that I was hoping for. And second, the rigging idea proved too flimsy to implement. I like my final models to have a level of "swooshability" and even before I had added any structural weight to things the riggings were falling apart.
If you look at the larger shots you might notice that I extended the standard LEGO propeller blade to nearly double the length. This was necessary to keep the lifting blades from looking unbelievably wimpy.
The front engines remained very close to the original sketch.
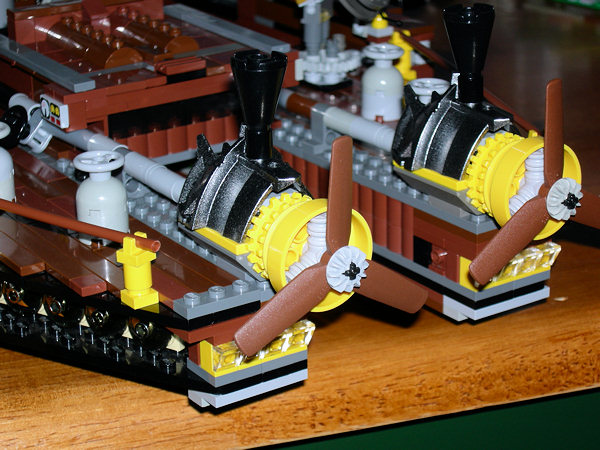
The engine cowling I used here came from a LEGO Knight set - in specific, that's the knight's shoulder armor with smokestacks attached. The end result is a nice cross between a locomotive engine and an early airplane - just the right combination for Steampunk.
Since each engine is being fed steam directly from the boiler, a backup set of valves is installed in each line (seen in the detail above at the far left) to help regulate pressure.
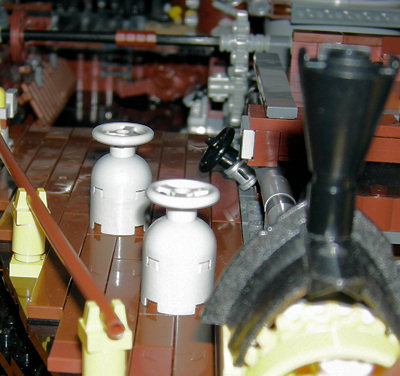
Two micro-boilers are installed near each engine in case of a break in the steam feed. They can also be engaged to provide that extra bit of "oomph" to outrun a customs corvette...
"Just by accident" these small boilers are located at the same location as the round access areas on the Star Wars Falcon's front wedges. Go figure.
A couple of non-engine related details: There's a floodlight array at the tip of each wedge. You can also see the cabin window (located between the wedges) clearly in the shots above.
Next we'll take a closer look at the cockpit.
[ Next ]
[ 1 2 3 4 5 6 7 8 9 10 11 ]
[ Movie ]
[Discuss]
-5-
Portions of this site make extensive use of Macromedia Flash. |
![]() |
|
![]() | Read updates on your
| Read updates on your ![]() Livejournal Friendslist
Livejournal Friendslist